What is Miro whiteboard?
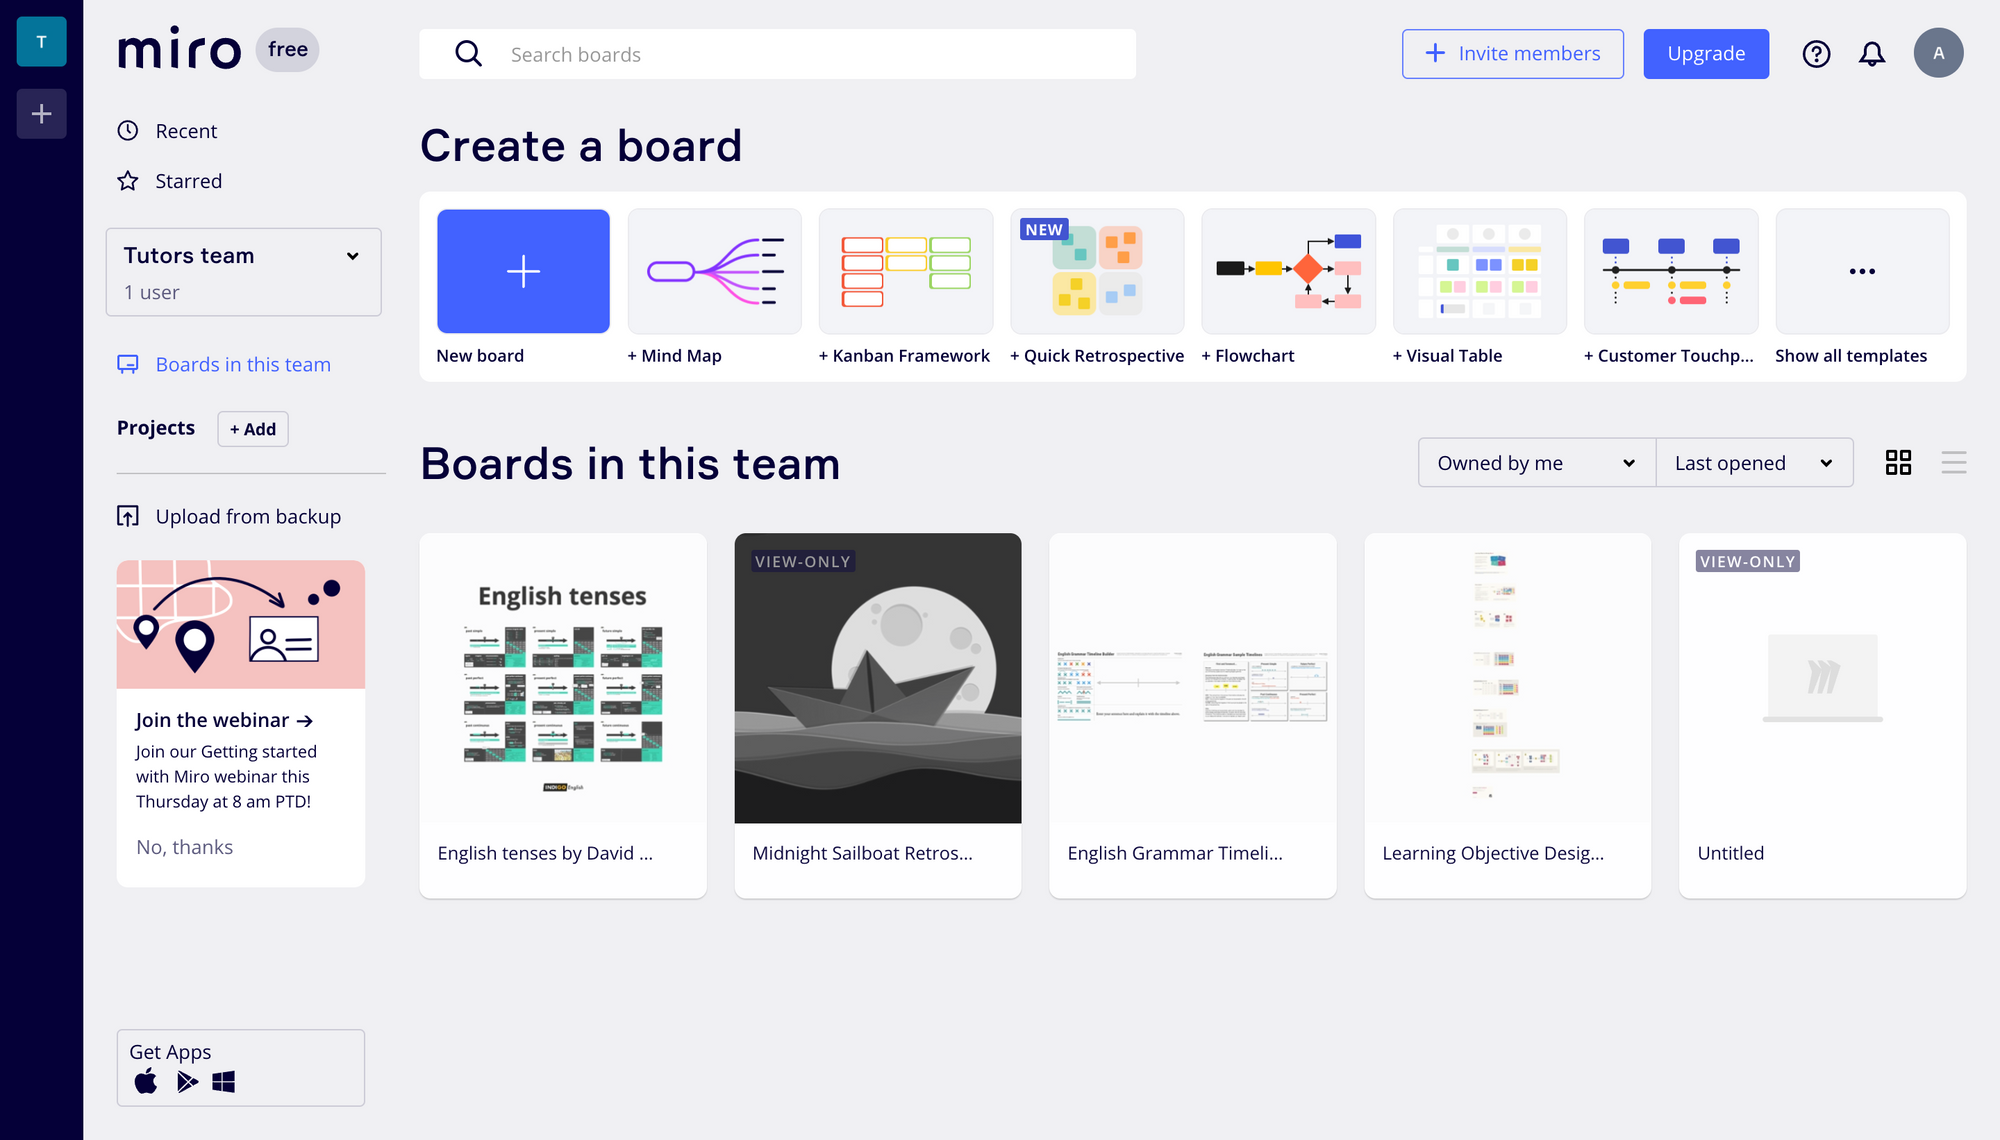
Miro provides you with a digital whiteboard to create canvases and use them in your classes. After signing up for free, you have your very first board to work with. Start drawing, using online sticky notes, digital markers, different shapes, diagrams, schemas, etc.
If you’re unsure where to start, check Miro’s templates. You can find various tools and diagrams that will help you. With this tool, you can structure and customize your lesson plans, topics, rules, etc., and share them with your students.
Step 1—Registration
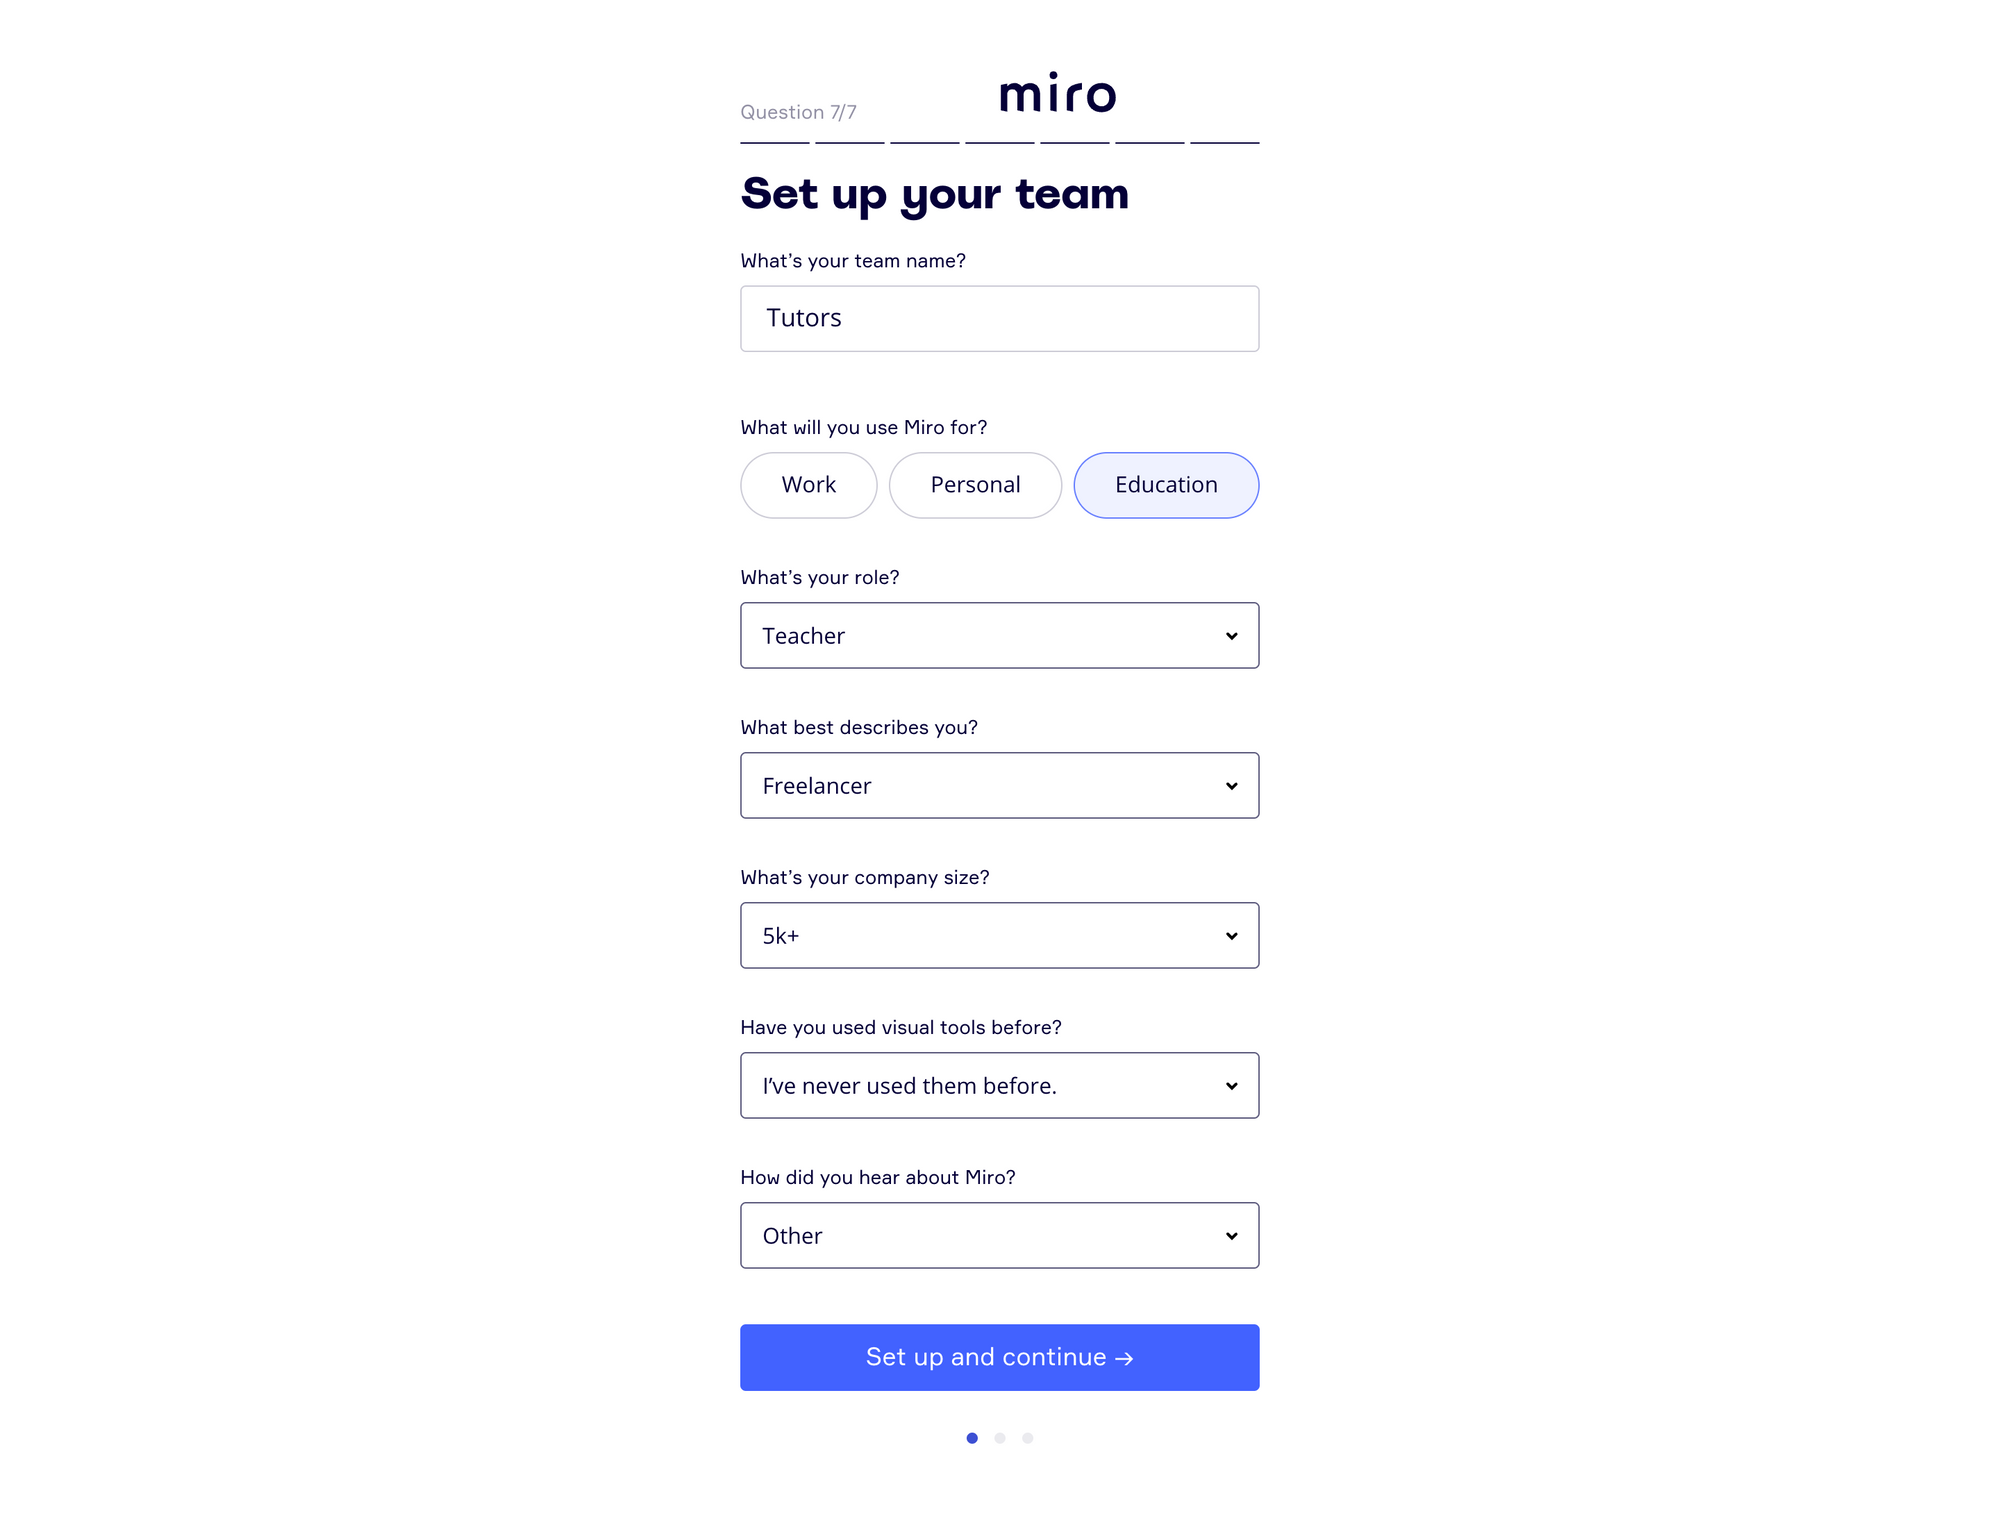
You can use the tool without an account, but the boards you create will disappear in 24 hours. So, we recommend you sign up and save your boards to use them for students. The registration flow has 7 questions, so do it beforehand so as not to waste your lesson time. Visit this link to sign up.
Step 2—Using Miro During Lessons
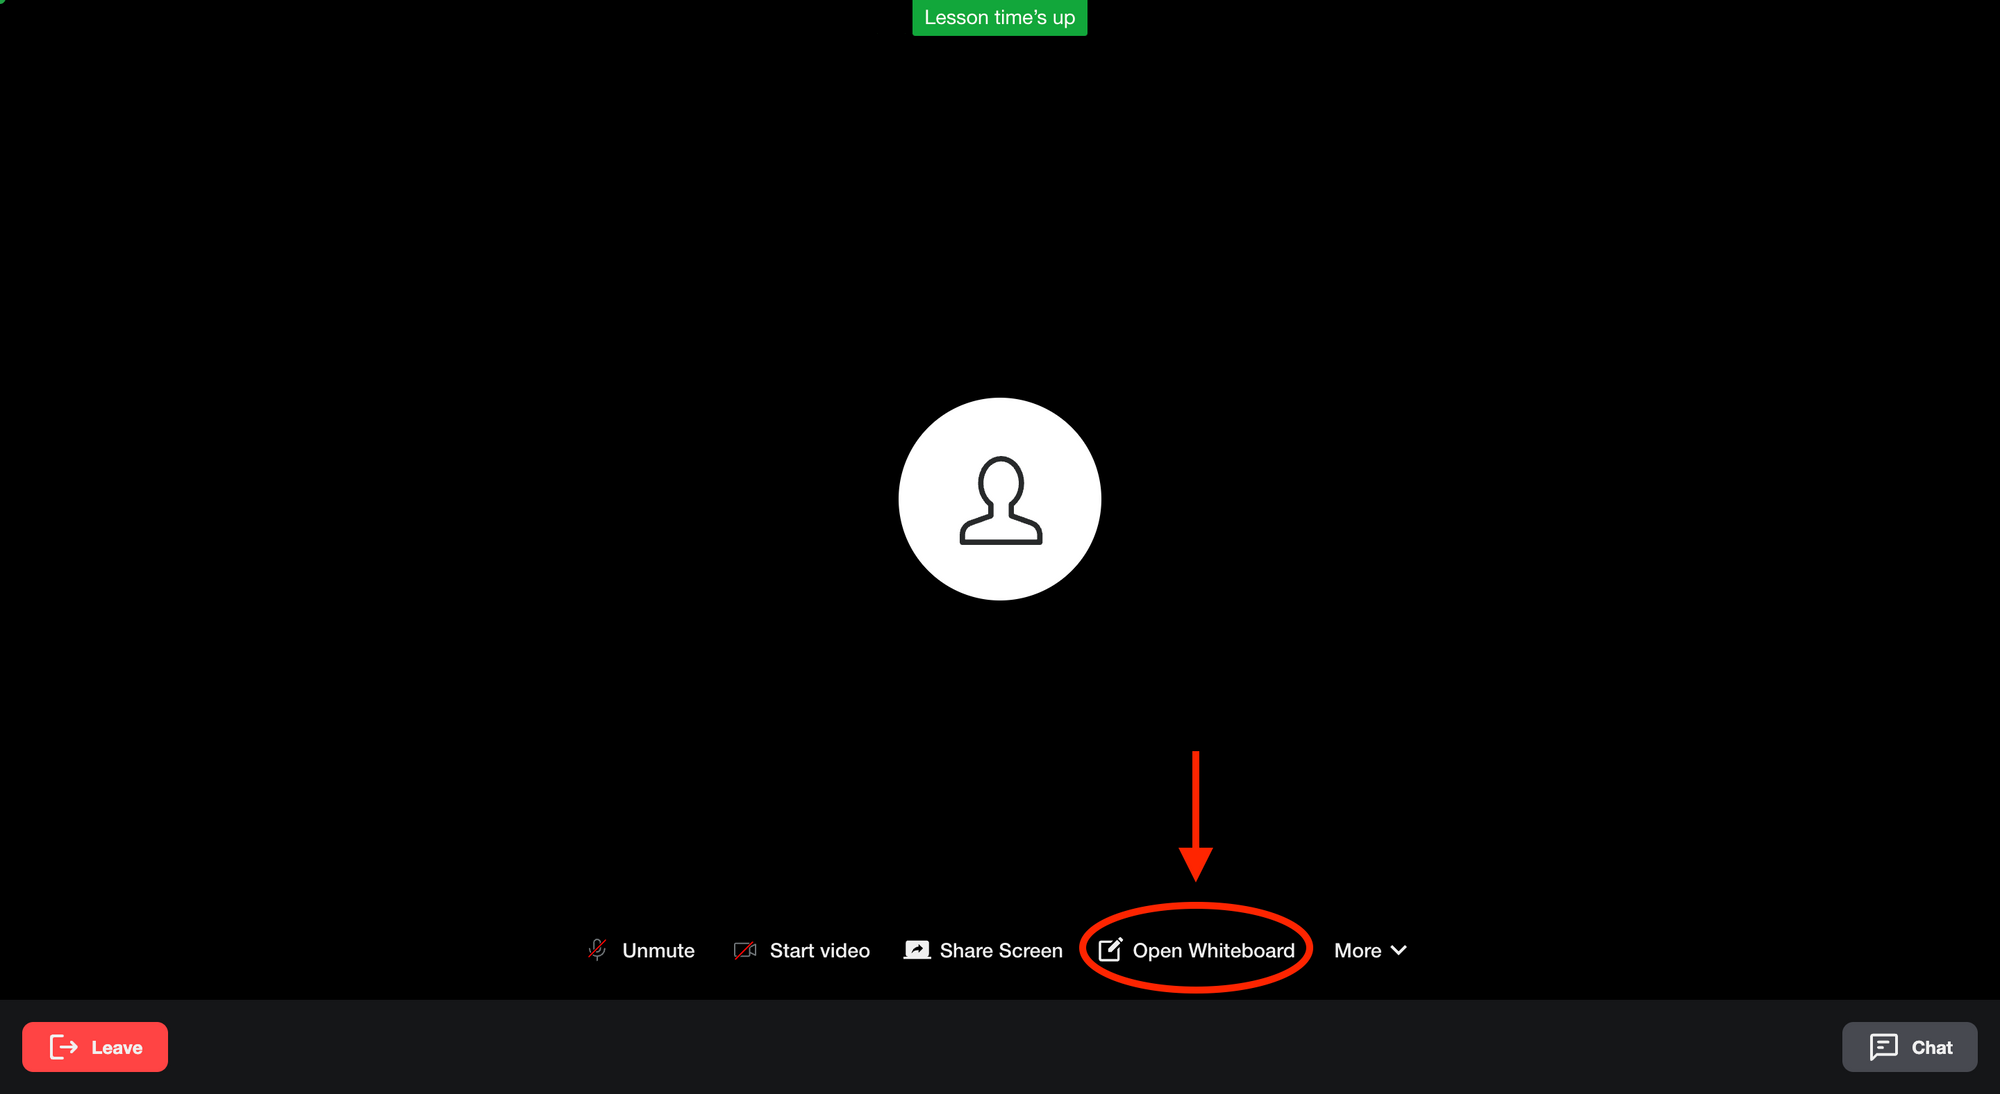
When you’re in the lesson room, click “Open Whiteboard.” You will get to a new tab with Miro. Choose how you want to use it (signing in or without registration).
If you want to create something on your board during a lesson without saving it, click “Create board,” and it will get you back to the lesson room with your board on the screen.
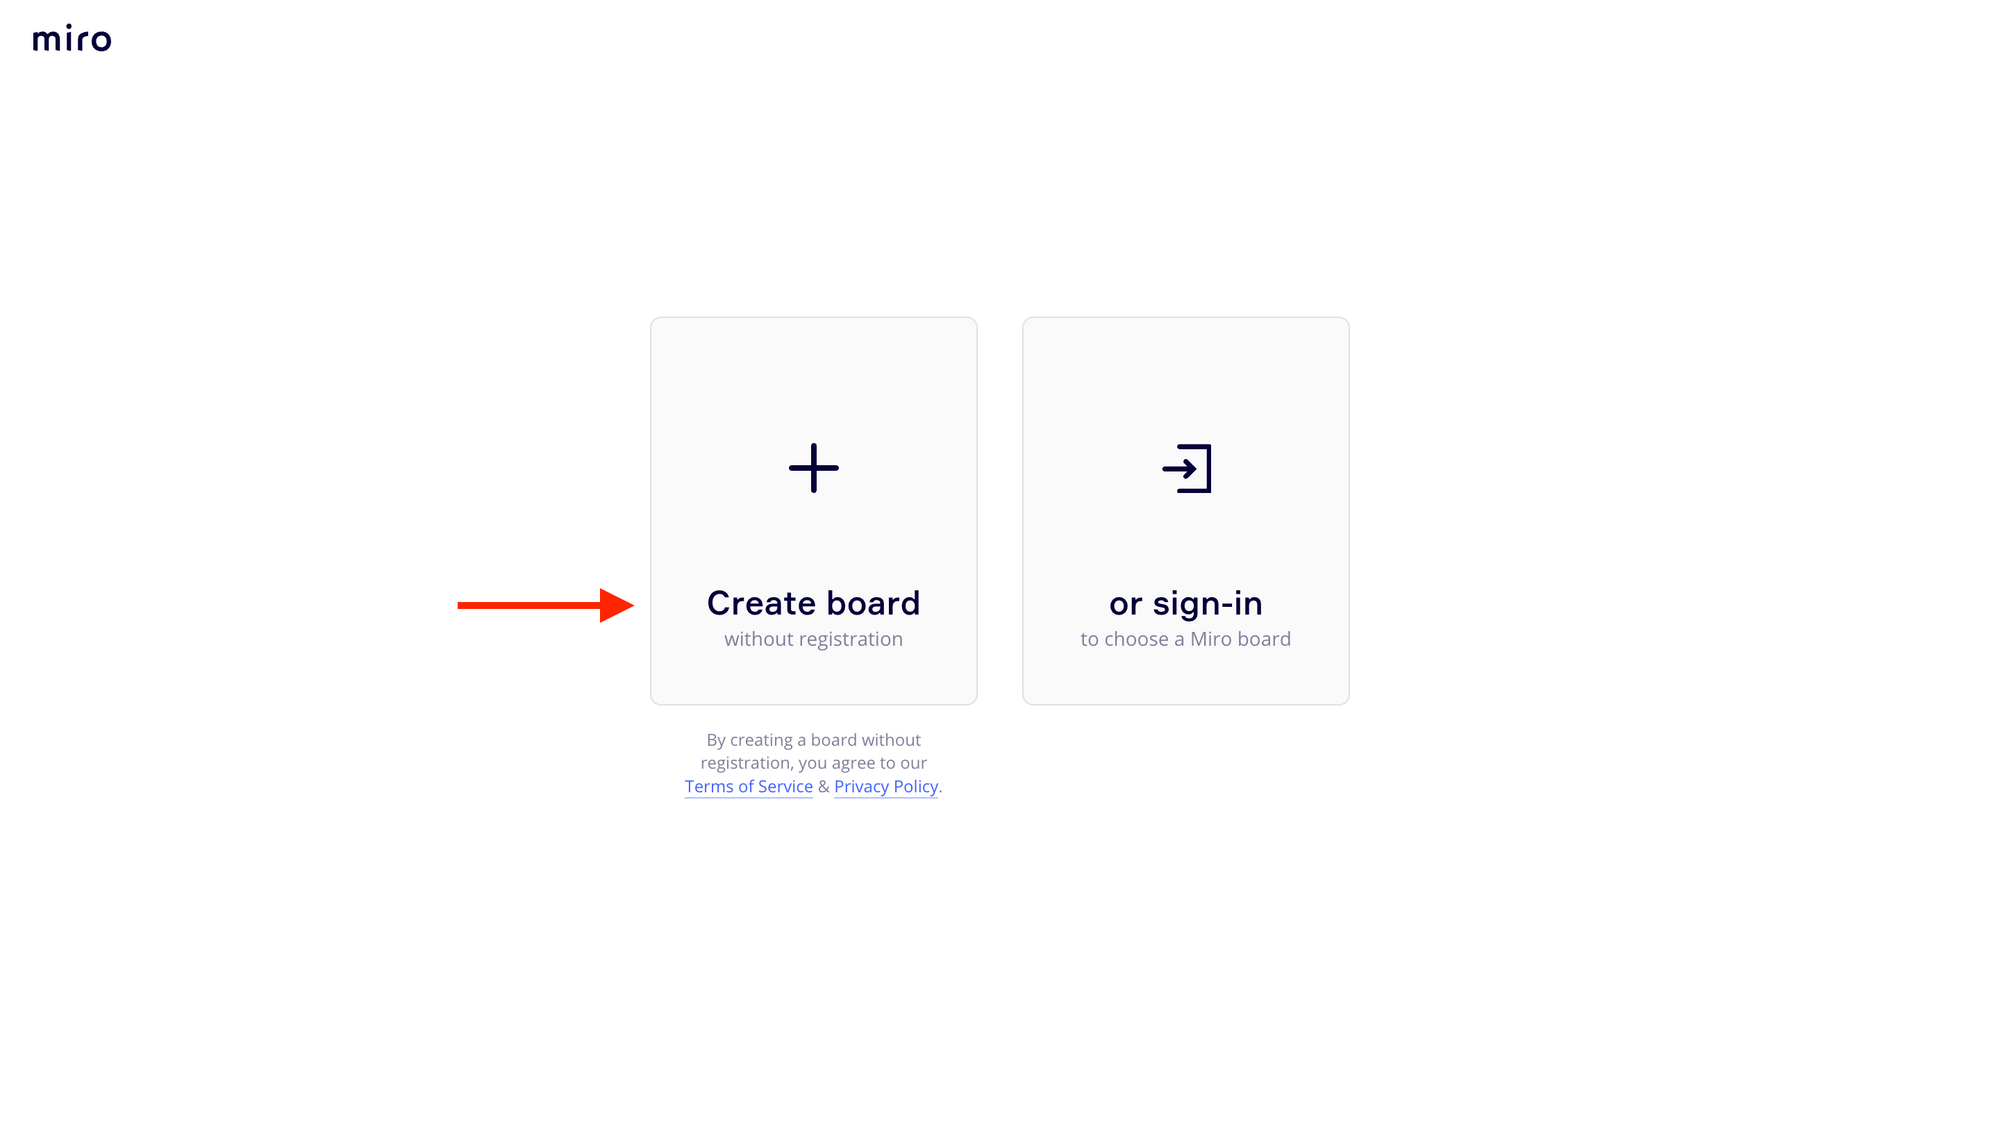
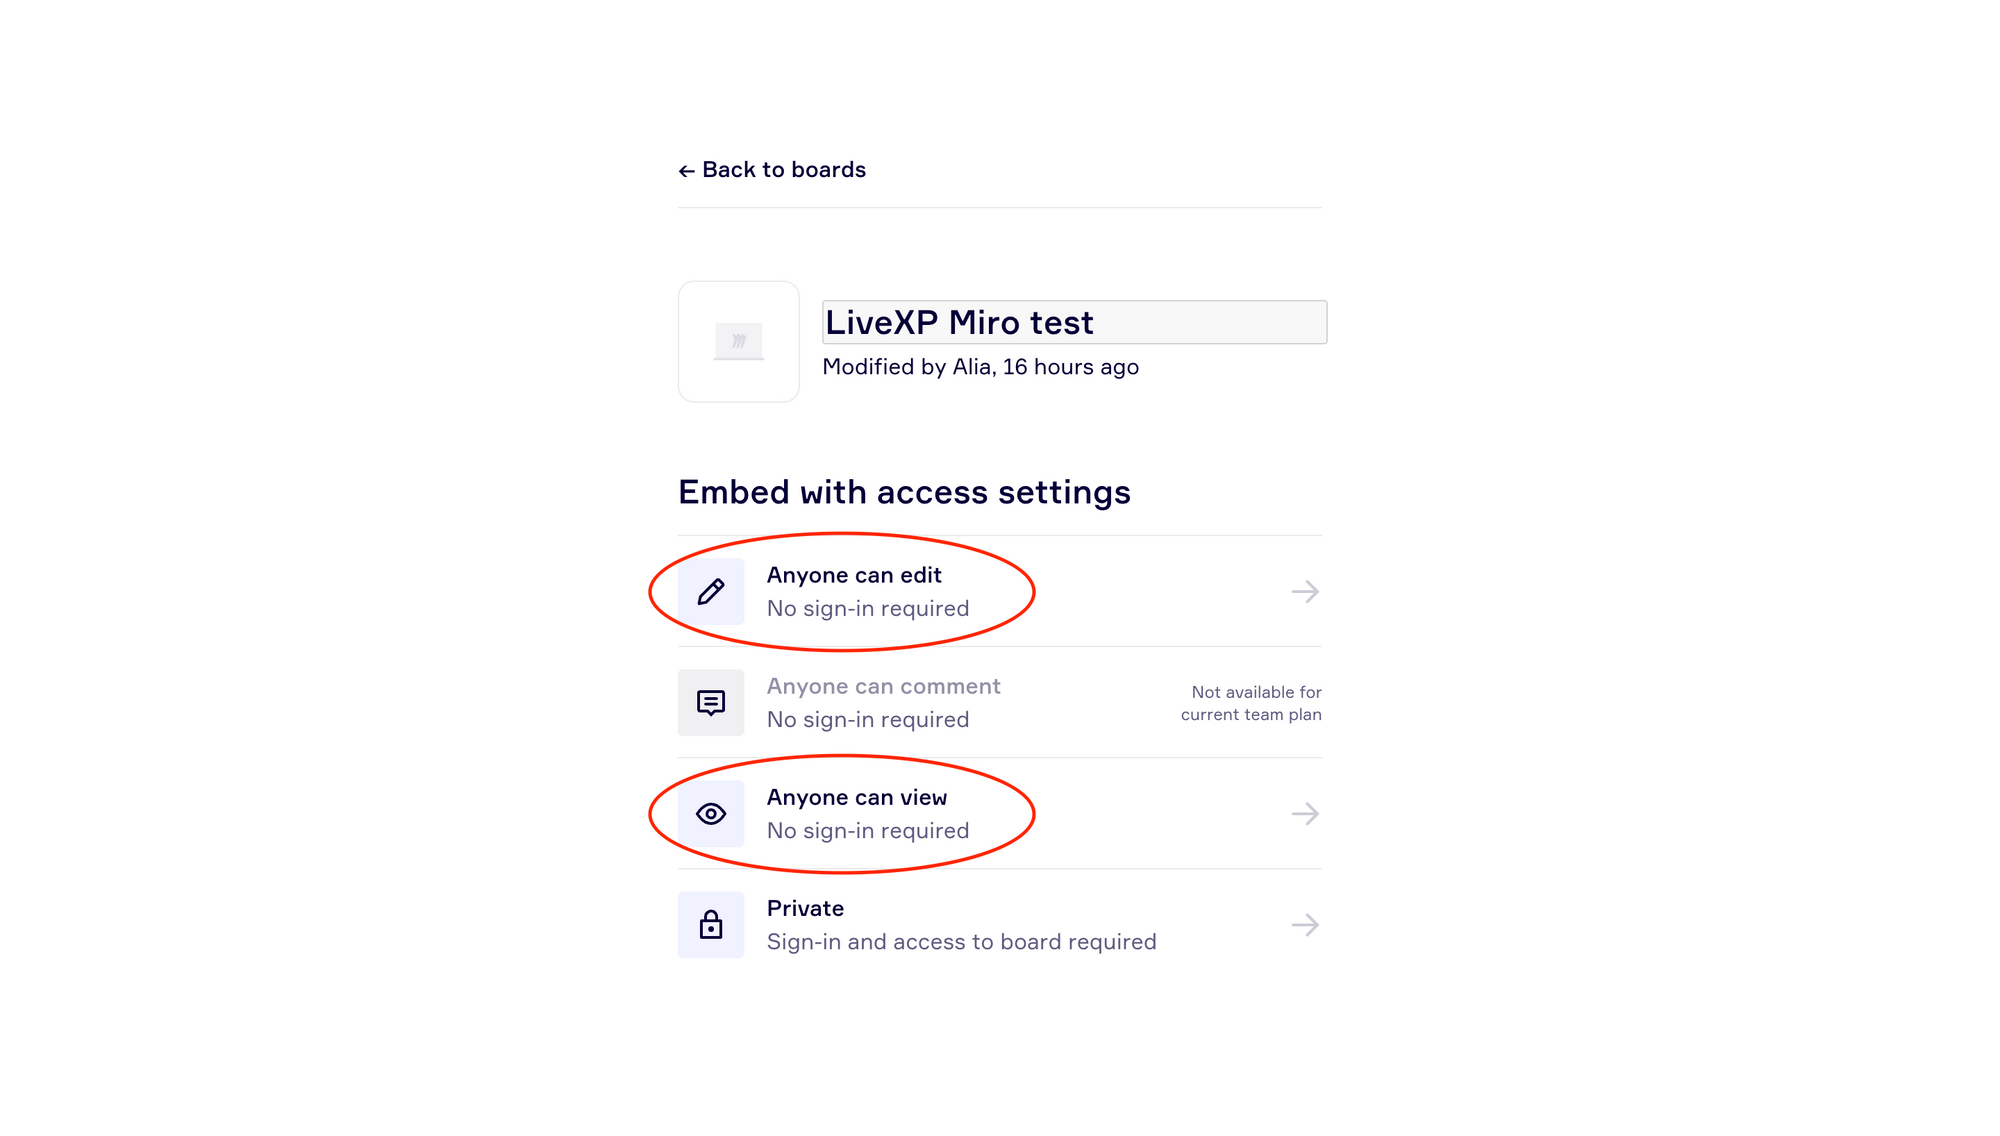
If you used the Miro tool before and had some boards to share with your students, just sign in to your account and feel free to use them. Click on the board you want to show, choose the access (view only or editing), and you will return to the lesson room with your board on the screen.
The student will see the board on the screen as well, but they can zoom in on the area they want to see. So, make sure your student sees what you want them to see. If you want the student to follow you on the whiteboard, they should click on your avatar (in the top right corner).
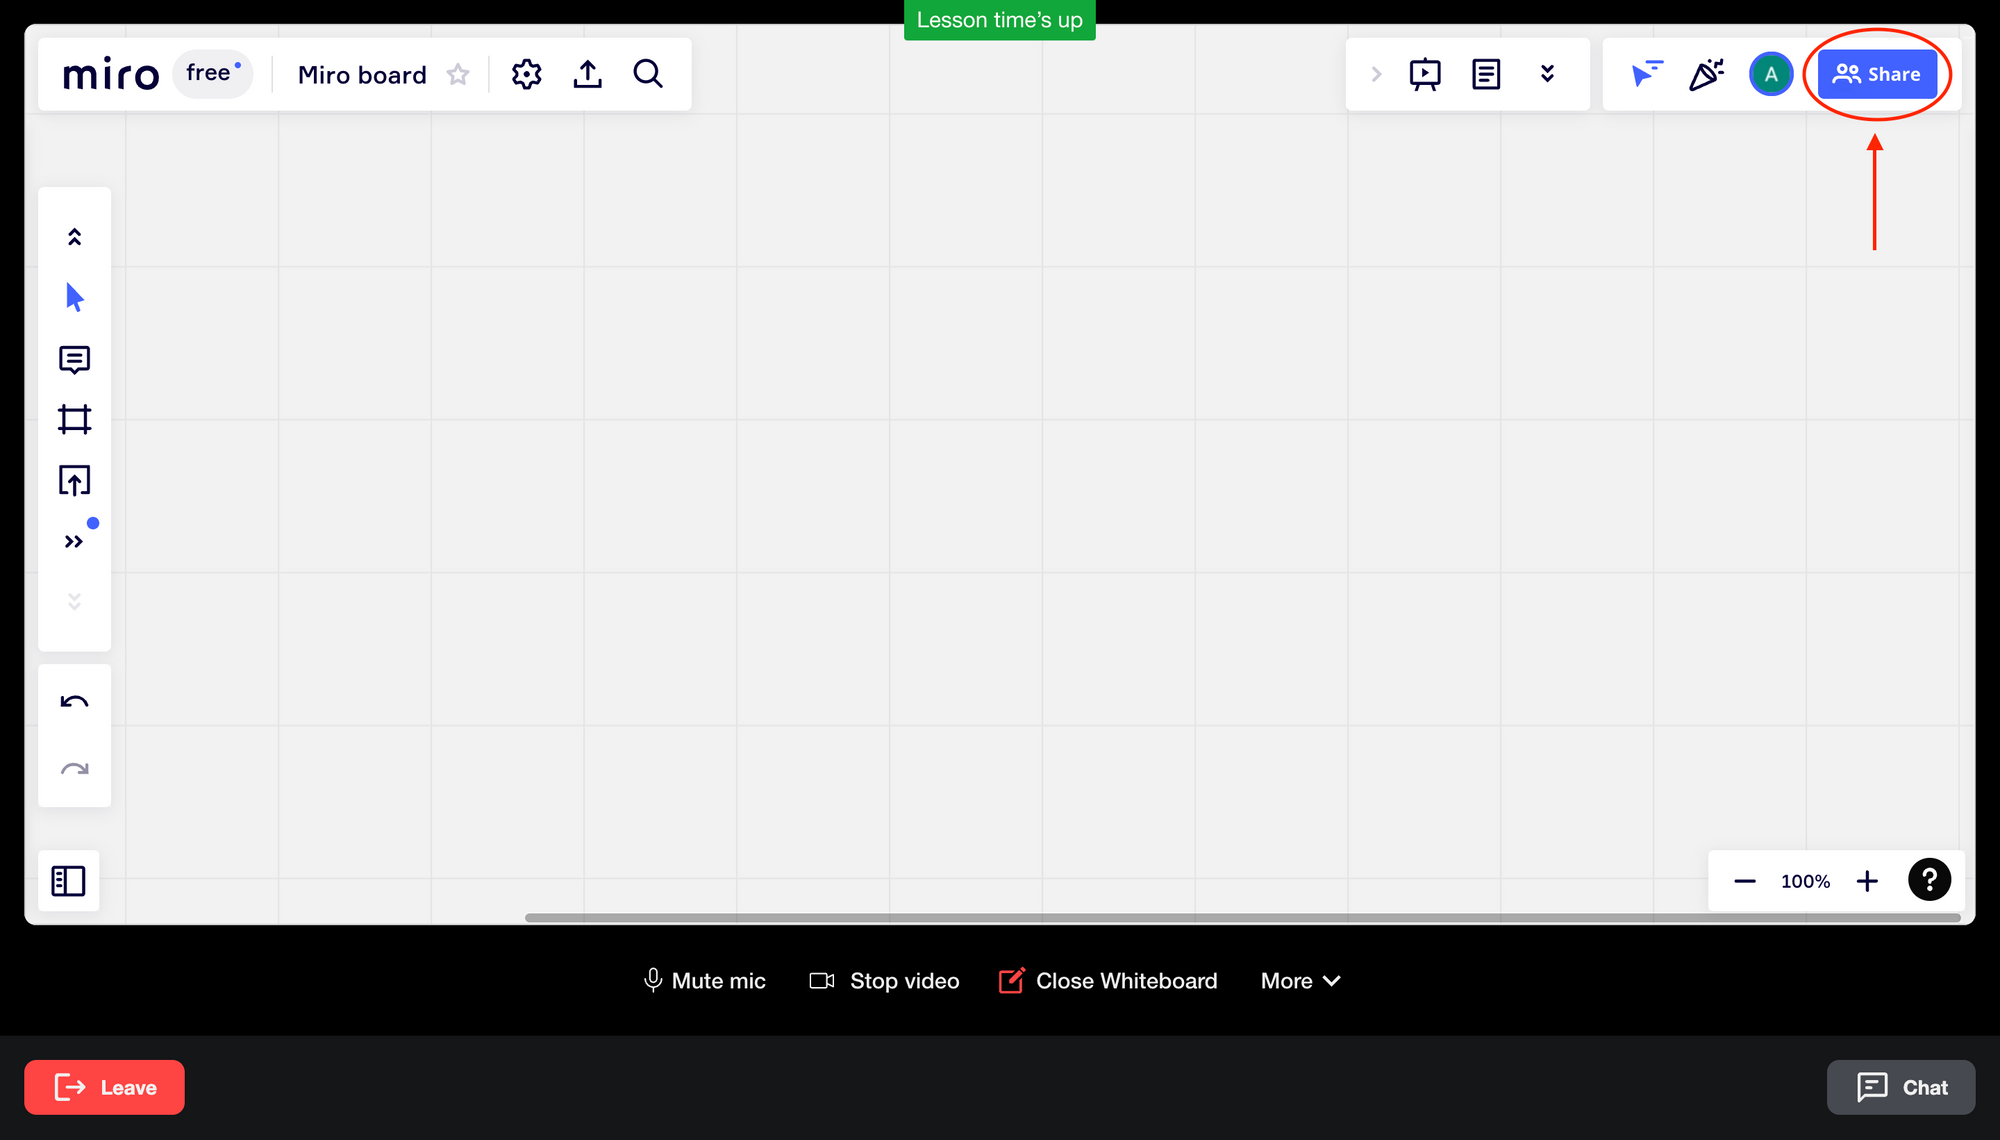
After choosing editing access, the student will be able not only to see your board on the screen but also interact with it, write or draw something, and do other things. You can change the access type while sharing Miro (“Share” button in the right corner).
Important! Turn off your whiteboard before leaving the lesson room.
After free registration, you can create no more than 3 editable boards. But they’re pretty big, so you can use one board for different students.
Step 3—Using Templates
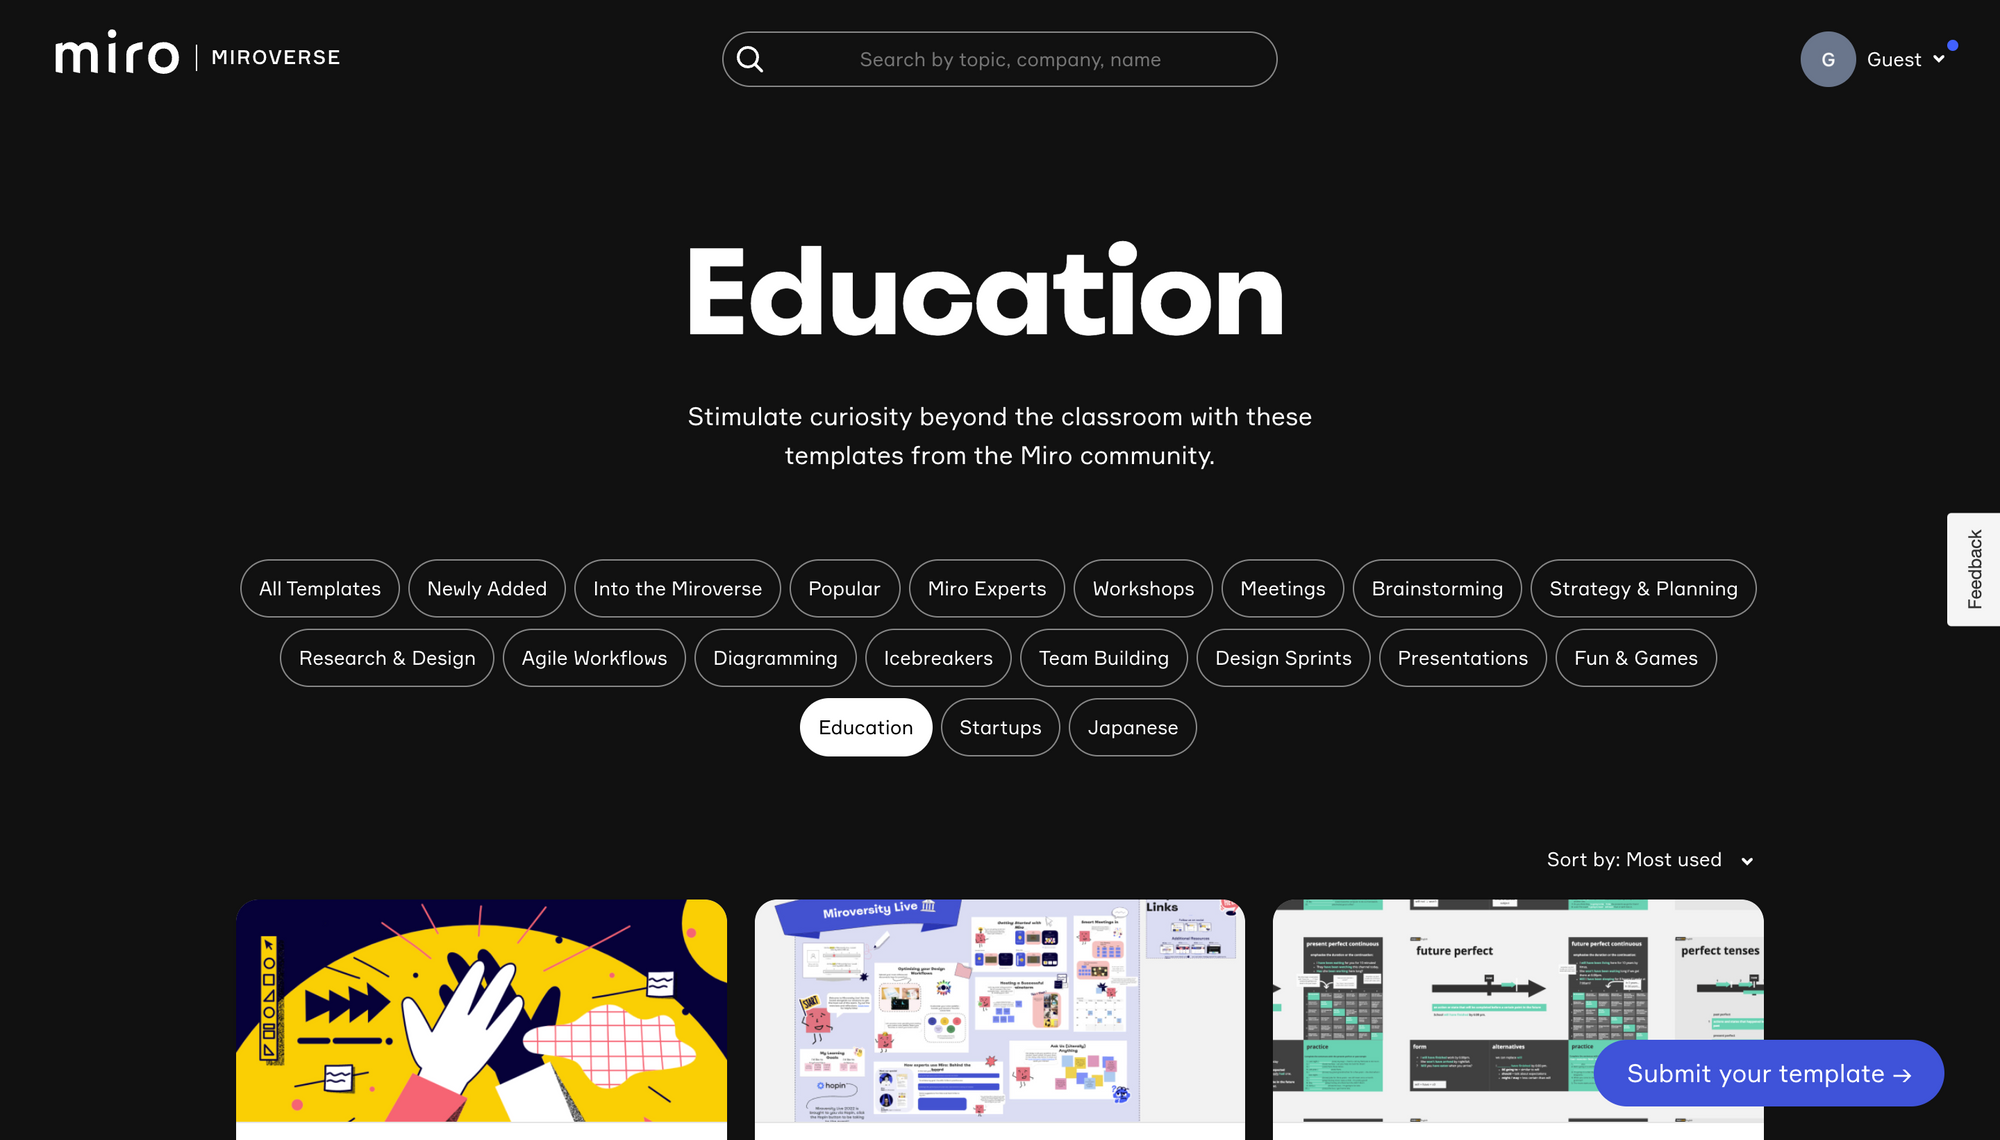
You can create your own board using various tools offered by Miro. Or you can use both templates and boards created by other users in Miro Community.
Type your topic and check the available templates. It’s really easy to customize and structure your lessons’ topics, whether it’s about grammar, writing, or reading.
If you want your student to check your board after the lesson, click “Share,” choose the type of access, and share to the address you need.

Useful Templates for Teachers
We recommend some helpful templates for LiveXP English teachers from Miro Community to make lesson preparation easier.
English Tenses template was created by an English teacher. This template will serve you as a focal point for grammar topics. It will help you quickly prepare for lessons and make them engaging and interactive.
English Grammar Timeline Builder is designed by an English teacher to help learn verb tenses more easily and effectively.
Classroom Boards. Simply pick the board that suits your lesson plan and organize lists, images, and explanations on the fly.
Click “Use template,” and it will appear on a new board. Each template creates a new board. Having a free plan, you can work with the 3 most recently created boards. Other boards become inactive.
If you want to use more templates, you can copy their content and paste it into one board.